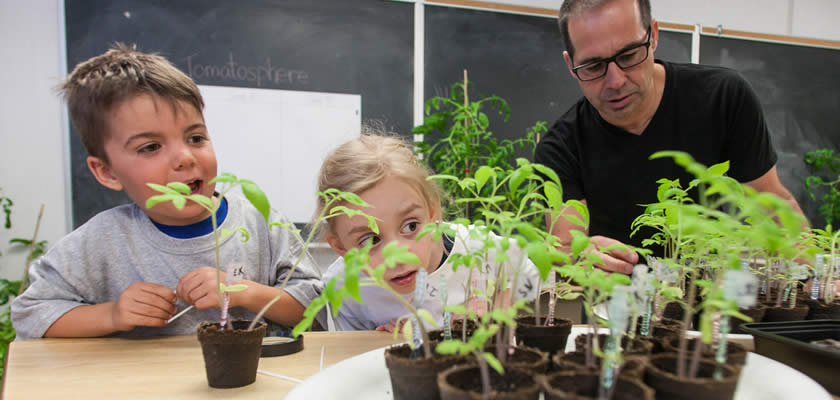
Seed Starting – How-to Guidelines

This article has been adapted from the web site of one of the Tomatosphere sponsors – Stokes Seeds. Stokes does the packaging and initial mailing to all schools for the project. If you have had little experience with “gardening” or planting, this will provide you with an excellent overview of the elements of taking a seed … to a plant.Red ripe tomato

Seeds are easy to start indoors. Many vegetable and flower varieties have unique requirements; the key to success is a little research before you start. Starting seeds is a very rewarding activity. Read the tips 'n tricks components – Before you begin the Tomatosphere Experiment and Conducting The Tomatosphere Experiment to find out specific detail about the Tomato seeds.

When your seed packets arrive, read the accompanying page with directions and print the two tips ‘n tricks noted above. Most seeds are easy to start indoors but if the amount of information seems intimidating, write out or highlight the sections that apply to you. Most annual and vegetable seeds do not require special treatment to achieve good germination. Remember that many factors will affect the growth of the plants and desired planting dates will vary based on your area. To get a more exact sowing date, first find your frost-free date, which is the approximate date of your area's last spring frost. Then back up the number of weeks required to grow the transplants to get the sowing date.

Different seeds have various needs in order to germinate. The tomato seeds should be placed in the peat pots to a depth equal to the length of the seed.

Planting containers

You can use just about any container to start seeds as long as it is at least 3" deep to allow for roots to grow. Yogurt cups, plastic take-out containers and margarine tubs are great choices. tomato seeds in containersAs well, save any cell packs and trays you get from the nursery. All containers should have holes in the bottom for drainage. Plant containers for seedlings need to be very clean to avoid disease and it is wise to disinfect all containers with a mild bleach solution. For simplicity, you can use peat pellets, which are a growing container and planting medium in one (you can find the Jiffy peat pellets on the Stokes order form). When soaked in water, the pellets grow to seven times their size. These pellets can be planted directly in the garden when the seedlings are ready. For consistency in the project, Tomatosphere recommends the use of peat pellets.

In 2010, Tomatosphere is suggesting (optional) the use of growing spheres for a small sample of the seeds; these growing spheres will allow students to view the germination process.

Planting medium

It is best NOT to use the soil from your garden that is often heavy and provides poor drainage. You may also bring in weed and in some cases, the garden soil will host disease organisms detrimental to your seedlings. There was a time that gardeners sterilized their garden soil in the oven to use for their seeding, but this is a tedious and smelly chore. It is best to use a commercially prepared ‘soil-less mix’, which can be found at garden centers, home improvement stores or on-line. These mixes usually contain peat moss (which is naturally sterile), vermiculite and perlite. All three of these mix components are light in texture and retain large quantities of moisture while still being well drained. Most importantly ‘soil-less mix’ is a clean and sterile environment that will help keep your small seedlings healthy.

Temperature

The general rule for seed starting is start seeds warm but grow seedlings cool. Don't try to germinate your seeds on the windowsill. The outdoor temperatures will make this area too cool. Most seeds are genetically programmed to germinate only in warm soil. You can keep the seed trays consistently warm by placing them on top of a water heater or refrigerator. Fluorescent lighting or heat lamps also can keep the soil warm. If your area is quite cool, a seedling heat mat may be your best option. Commercial greenhouses use both lights and hot water heating systems to keep seed trays warm.

Moisture

watering tomato plantsSeeds need to be constantly moist in order to germinate. Do not let the growing mixture dry out or equally as important get too wet. Moisten the growing mix thoroughly before sowing. Stir the mixture with your hands to distribute the moisture. After the seeds are sown, place a humidity dome or plastic wrap over your container to slow evaporation. Check every day for signs of germination and remove the cover as soon as you see a sprout so that the air can circulate around the emerging seedlings. Water with a fine spray of warm water or water the peat pellets from the bottom by putting water in the tray in which the peat pellets sit. Avoid watering with really cold water.

Light

Lack of light is probably the number one reason people get discouraged as seedlings grown in weak light will stretch, will have weak stems and often a pale color. Seedlings need 14 - 16 hours of light from the moment they germinate. They also need at least 8 hours of darkness to process their food and grow. Growing seedlings on a windowsill is not recommended, as they will stretch toward the light and most windowsills have low levels of light. If the windowsill is your only option, turn the containers daily so they don't have to stretch and reach for the light. You will know if your seedlings need more light if they are pale and weak.

Fluorescent lighting or grow lights are your best option. Even if you don't have a store-bought stand, one can be made with a cast-off fixture, some cedar or treated lumber, screws, nails and cords. The best growth will occur under the maximum light you can provide. Mix the types of bulbs used since the cool white provides light in the blue/green range and encourages leaf growth, while a grow light or warm light provides light in the red range, which encourages flowering. This way you have a full spectrum of light. Replace the bulbs yearly, as the light intensity decreases significantly even in the first few months of use. Keeping light bulbs longer doesn't save money compared to the poorer growth of the plants. Get your plants as close to the light as possible by putting the lights on adjustable chains keeping them 2 - 4 inches above the tops of seedlings. Move the light fixtures up as the seedlings grow. Incandescent or LED grow lights also work well but can be more expensive overall than fluorescent. Adding artificial light can also help keep seedlings warm.

Thinning

Note – this does not apply to situations using the peat pellets. The new seedlings need additional space to grow as soon as their first "true" leaves appear. It may seem heartless, but the weakest and spindliest seedlings need to be cut off at soil level so that the strongest ones can get stronger. If your seeding is rather dense, do not pull out unwanted seedlings as their roots may be tangled up and damage the root of the seedling remaining. At this point it is a good idea to place a fan on your plants. This will make their stems sturdier and get them ready for outdoors. As well, good air circulation will keep moulds and mildews at bay.

Transplanting

If you did your planting in individual containers, transplanting is not necessary before you set them outside. Seedlings in seed flats need to be transplanted into 4" containers by the time you have 4 true leaves. This will give your seedlings more room to grow, stimulate the feeder roots and improve ventilation. To transplant, hold the seedling by its' leaves, not the delicate stem. With a butter knife, spoon or fork, gently cut around the seedling root and lift up. Place into a pre-moistened container, slightly deeper than they were in their flats. Firm the soil around the seedlings, and water immediately.

Fertilizing

After transplanting, fertilize once a week with transplant fertilizer or a half-strength well balanced fertilizer. After about 3 weeks you can start fertilizing at full strength. Over-fertilization can result in leggy seedlings. If your seedlings are starting to look leggy, pinch back the growing tips to promote more branching. This can be repeated every week or so to promote compact, bushy plants.

Hardening off

Hardening off is basically getting your small plants ready to face the great outdoors. There are many different ways this can be accomplished. children planting tomato plantsAt least a week before you plan to set the plants into the ground they need to gradually get used to the sun, wind and various outdoor temperatures. A cold frame, which is a sheltered unheated box with a translucent cover is the best means for this transitional period. The lid can be gradually raised to expose the plants to more sunlight. If you don't have a cold frame, you can also use row covers (Stokes carries various sizes, which will help protect the plants. You can also place your plants in a shaded, sheltered part of your garden for a few hours each day, gradually moving them into more sun. These unprotected plants will have to be brought back indoors each night unless you know it is going to stay above 50°F/10°C all night long.

Things to watch out for

If you have followed the directions above, your seed starting should be relatively trouble free. There are however, a couple of problems that may creep up on you.